(Don't) let it snow

| No Comments | No TrackBacks

Well, it has been almost three months since my last entry. That's not because work stopped -- it did not. But I've been busy and a lot of the work wasn't easy to photograph without being in the way (during the day, while work was in progress) or couldn't be photographed (at night, without light in the house).

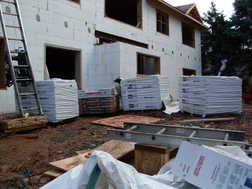
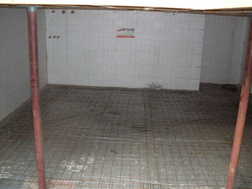
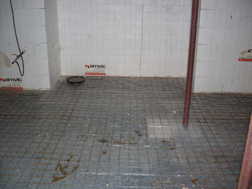
We did loose sometime due to the weather, unfortunately. We had hoped to pour the concrete for the garage floor and front porch but that did not happen due to the multiple blizzards and ice storms. And we lost a few days as everyone was busy digging themselves out of the storm, or Victor had to get the job site dug out so everyone else had access again. They did finish the Duradek patio in front and back (though no railings are up) but I never got a chance to take a picture before it got buried in snow.

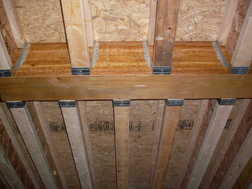
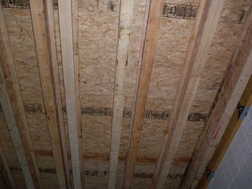
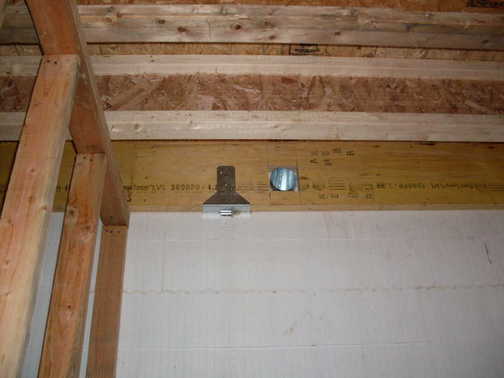
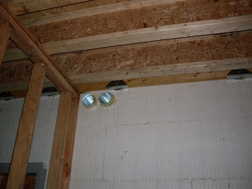
The rough HVAC work (supply & return ducts, and the equipment) is installed and pictures will follow soon. The drilling for the geothermal wells could happen as soon as this week. The rough plumbing is virtually complete and the rough electric has begun. Fire sprinklers will hopefully start this week as will the low voltage work (fire & security system, whole house audio, and conduit for future data, telephone & television wiring).

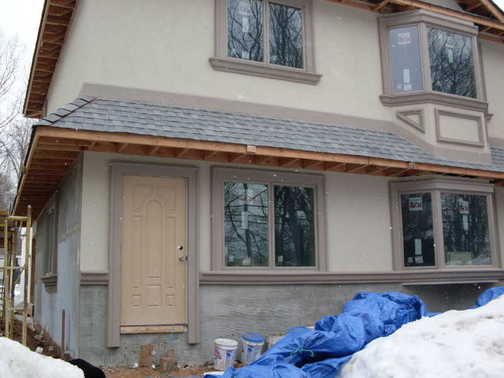
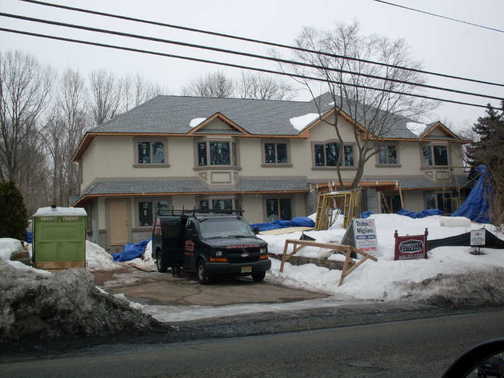
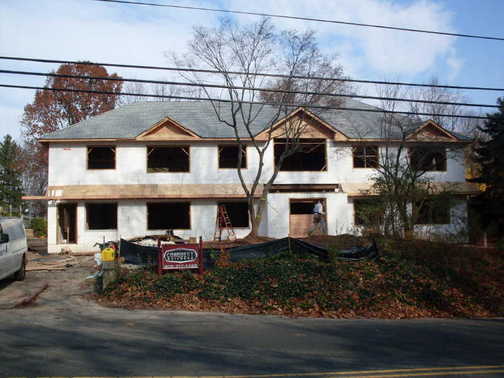
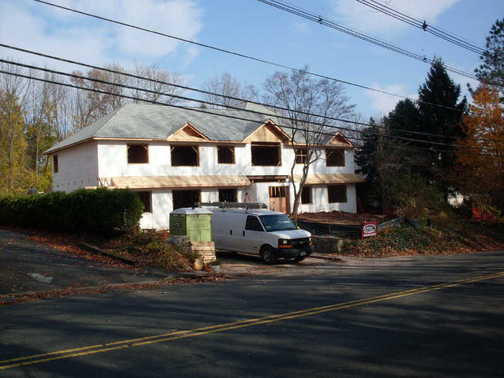
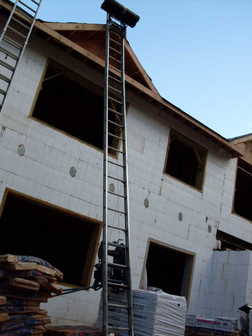
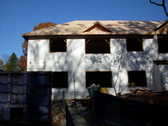
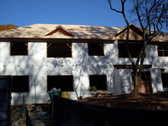
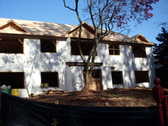
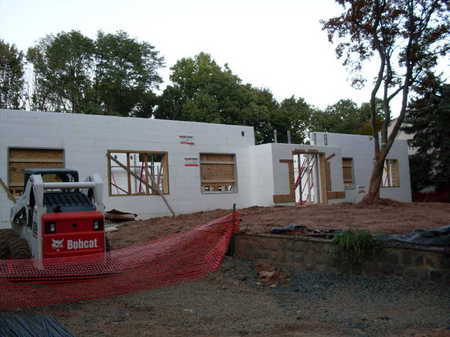
But, the stucco installers persevered. On the days before it got very cold, the installed the foam trim pieces and basecoat of the stucco. Then, when it got cold, they tarped the whole house and setup propane heaters under the tarp to keep things warm. I'm told that, on the upper levels of the scaffolding, you would still be sweating while wearing just a T-shirt, even if it was below freezing outside.

DreamHouseStucco.jpg
I have to admit - I kinda liked the blue house better than the finished product. It covered up all the pesky windows the architects added.
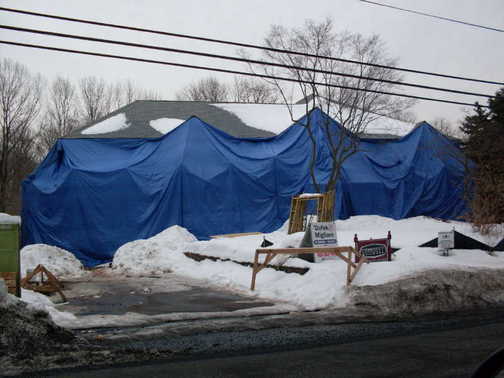
tarped.jpg

Of course, the finished product looks pretty good too. The decorative pieces are all just foam, attached to the ICF foam, though covered in concrete they tell me it would support someone standing on it. We choose to go with a trim color that matches the window trim color, and a lighter color for the house itself. (The door is unfinished; it will be stained a mahogany color later.)

stucco-detail1.jpg stucco-detail2.jpg
We're leaving the lower level of the house, next to the driveway, unfinished for the moment. The drill for the geothermal wells needs to get back there and Victor is concerned it will kick mud against the house dirtying the new finish. Cultured (fake) stone will also go on the house below the trim line.

Front corner.jpgrevealed.jpg


The framers back

| No Comments | No TrackBacks
The framers are back. Only five guys (or so - I didn't actually count) but they were working quickly to frame the eaves (below) as well as the garage (pictures to follow). They are from Double Hammer Construction, by the way.

DoubleHammer.jpg

soffit-1.jpgsoffit-2.jpg

Victor and Chrispin (from Conquest Builders) had previously added some wood to the vinyl window bucks so that we can set the windows towards the outside of the house instead of inside. Makes the house look a bit more "normal" but also gives us some extra space on the inside because of the depth of the ICF walls.
window-1.jpgwindow-2.jpg

And, while I'm at it, lets step back and take a look at what we have so far.
house-1.jpg

house-2.jpg

And the roof goes on

| No Comments | No TrackBacks
Sorry, Marco (Integrity Remodeling) - you were on the roof while I was on the ground taking a few pictures. You didn't know who this nut snooping around your job site was until you called Victor. But (at least from the ground) it looks like you do good work. On the other hand, we might need to get you a new sign for your truck.

SDC10832.jpg

Its a good thing you have some mechanical help because getting all this material to the roof would be a back-breaker.
SDC10826.jpgSDC10827.jpg

But some GAF Weather Watch leak barrier, a GAF Cobra Exhaust ridge vent system, some starter shingles, 50 squares worth of GAF TimberLine 30 Fox Hollow Gray shingles should lead to a large part of our weathertight home.
SDC10825.jpgSDC10831.jpg
SDC10830.jpgSDC10829.jpg

FoxHollowGray.jpg

I've been remiss

| No Comments | No TrackBacks
I've been remiss. Lots of work done but I haven't had time to take the pictures or post updates. The second floor walls were poured, the basement floor was poured, the second floor interior walls and attic floor were built and here you can see that the roof was framed and sheated as well.
front-1.jpgfront-2.jpgfront-3.jpg

Second floor walls and front steel

| No Comments | No TrackBacks
Work on the last of the insulated concrete forms continues - we're almost ready for the last of the walls to be poured.
front-1.jpgfront-2.jpg

The steel plate was welded to the steel beam and both were lifted into place above the front door/under the front porch. Then the LVL was put up against the beam and steel bolts were used to hold them together. Finally, the joist hangers were mounted to the LVL to hold up the floor.
beam-1.jpgbeam-2.jpg

Steel beams

| No Comments | No TrackBacks
If you've been following, you've seen the Big Beams made of wood. A few of them in various places around the house, more than just the pictures you've seen. But some places, wood just doesn't do the job. So, today we got some steel.

There's one big (32 ft. 2 in, W10x26) steel beam for the garage.
garage-1.jpg
garage-2.JPGgarage-3.jpg

And there is a steel beam and a steel plate which will hold up the front porch area.
front-1.JPGfront-2.JPGfront-3.JPGfront-4.JPG

Oh, and Victor finally put his Conquest Builders sign up out front. We got him a prime advertising location, he may as well use it!
conquest.jpg

Studs up

| No Comments | No TrackBacks
Up until now, it was just one big first floor. But now we have the studs up for all the first floor walls so its easier to picture what the house will look like when it is done. (Easier - not easy. And worse in 2D pictures where depth perception is much more difficult.)

Here's a view from inside the first floor office space.
officedoor-1.jpgofficedoor-2.jpg

And a view from the family room "through" the walls into mom's bathroom, closet and laundry room, as well as the bedroom beyond.
moms-1.jpgmoms-2.jpg

Depending on what is above, the joists are spaced differently so don't just assume that they are located every 12" or every 16" apart.
joists-1.jpgjoists-2.jpg

Some penetrations lined up perfectly and just required a small pocket in the LVL.
penetrations-1.jpg

Still others were easy fit in the LVL but then got blocked by a floor joist. (You might recognize these three penetrations from the last entry to this site.)
penetrations-2.jpgpenetrations-3.jpg

And yet others are oh so close but blocked by part of the joist hanger. In all these cases, we'll just workaround these issues as work proceeds on the construction.
penetrations-4.jpgpenetrations-5.jpg

The subfloor is glued down before it is nailed so it should hopefully never creak or feel spongy as you walk on it. And I wouldn't want to get try to count how many nails were used so far (or will be in the weeks and months to come).
adhesive.jpgnails.jpg

First floor walls poured

| No Comments | No TrackBacks
The first floor walls have been poured. Don't have any pictures of the process itself and it doesn't look much different afterwards, unless you look down into the wall cavity which is hard to photograph.

Some wondered how you get concrete down underneath the window bucks. The answer is simple: put a hole in it. As they do everywhere, a concrete vibrator is used to make sure the concrete flows into all the nooks and crannies but you have to get it down into the wall first.

window-buck.jpg

Also, before the poured the walls, holes are cut and PVC or sheet metal sleeves are put in place for all the bigger penetrations (bathroom fans, kitchen exhaust fan, electrical service entrance, etc.) If its a small hole (under two inches in diameter), they'll just use a hammer drill later on. Here we have penetrations for two bathroom fans and one dryer exhaust fan.

penetration.jpg

Wood is good for lots of things on a construction site. One use is to cut it to size and then use it to verify your measurements. In this case, a note on the board indicates it is being used to make sure there is 8 ft. 4 in. between the top of the footer and the bottom of the floor joists. Add 4" of the concrete slab and we have 8 ft. ceilings in the basement.

note-1.jpgnote-2.jpgnote-3.jpgnote-4.jpg

Ready for a basement floor

| No Comments | No TrackBacks
We're ready for a basement floor. We had the walls, then the stone. Now we have a vapor barrier and metal mesh to reinforce the 4" concrete floor.
basement-1.jpgbasement-2.jpg

First floor walls almost ready to pour

| No Comments | No TrackBacks
We're almost ready to pour the first floor walls.
front.jpg

inside-1.jpginside-2.jpginside-3.jpg

firstfloor.jpg

And, if you were wondering (I was), they extended at least the one footer I could see.
footer.jpg

Oh, and if you were wondering what the inside of a lally column looks like...
lallycolumn.jpg